Homemade wine guide
How to Bottle and Cork Homemade Wine
As an Amazon Associate we earn from qualifying purchases. How we choose products.

On this page
Bottling is the last step of making wine at home, and the one that decides whether your wine keeps for a few weeks or for years. To bottle and cork homemade wine you need a clear, fully fermented and stabilized wine, clean and sanitized 750 ml wine bottles, new corks in the right size, a siphon and a corker. The job itself is simple: sanitize, fill, cork, stand the bottles upright for a few days, then store them on their sides somewhere cool and dark.
This guide follows the bottling advice in three extension publications: NDSU Extension's home winemaking guide (reviewed in 2026), Clemson Cooperative Extension's Basics of Home Winemaking (2023) and Virginia Cooperative Extension's guide HORT-213. Further down we compare the two kinds of wine corker, floor and double lever, and the corks and bottles that go with them.
When Is Homemade Wine Ready to Bottle?
NDSU Extension's rule is that bottling should be done only once the wine has been racked off any remaining sediment and has achieved good clarity, and it warns that bottling before the wine is fully stabilized can leave sediment forming in the bottles as they age. Three checks cover it.
Fermentation Has Really Finished
Take specific gravity readings a few days apart. For a dry wine the reading should be below 1.000 and stay the same. If it is still drifting, wait; corking a wine that is still fermenting is how bottles push their corks or, worse, burst. Our guide on how long wine takes to ferment explains the readings in detail.
The Wine Is Clear
Hold a glass of the wine up to a light. If it is still hazy, rack it again and give it more time; the Virginia Cooperative Extension guide racks again whenever sediment forms after one to two months.
The Wine Is Stabilized
If you plan to back-sweeten, or the wine still contains some sugar, stabilize it first. Clemson Extension adds potassium sorbate at bottling according to the manufacturer's recommendation, and both Clemson and NDSU Extension warn that skipping it can make bottles shatter if fermentation restarts. Sorbate is normally paired with a sulfite addition; see our page on Campden tablets per gallon for that dose.
What You Need to Bottle a Batch
A six-gallon batch fills about 30 standard bottles. Everything else on bottling day fits in one box.
-
1Wine bottles
North Mountain Supply W5 Flint 750 ml Bordeaux Bottles, case of 12
Clear flat-bottomed Bordeaux bottles with a cork finish; the listing says they take #8 corks with a hand corker and #9 with a floor corker.
-
2Corks
North Mountain Supply Amorim #9 Agglomerated Corks, bag of 100
Chamfered #9 agglomerated corks, the size for a floor corker and standard US wine bottles.
-
3Corker
FastRack Italian Floor Wine Corker
Floor-standing corker with an adjustable plunger and grip handle, so one person can cork a full batch.
-
4Siphon
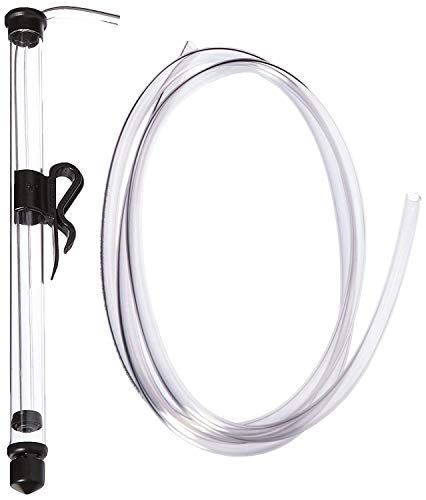
Fermtech Auto-Siphon Mini with 6 ft of tubing
Starts with a single pump, so you can fill bottles from a jug or carboy without sucking on a tube.
-
5Stabilizer
North Mountain Supply Potassium Sorbate, 2 oz jar
Only needed if you back-sweeten; it keeps the yeast from restarting in the bottle.



How to Bottle Homemade Wine, Step by Step
Set up on a sturdy table with the carboy higher than the bottles so the siphon runs by gravity, and have a towel ready for drips.
- Clean the bottles. For reused bottles, NDSU Extension soaks them in hot, soapy water to remove labels, scrubs the inside with a bottle brush and dishwashing detergent, and rinses well. It also advises against bleach and against antibacterial soaps containing triclosan.
- Sanitize just before filling. Rinse each bottle with a no-rinse sanitizer and let it drain, as NDSU Extension recommends. Sanitize the siphon, tubing and anything else that touches the wine.
- Stabilize if needed. If you are sweetening, add the sorbate and sulfite and sweeten to taste in the carboy, following the product labels, before you start filling.
- Siphon the wine into the bottles. Keep the siphon above the sediment, fill each bottle to the neck and leave a little space below where the bottom of the cork will sit.
- Cork each bottle. Use new corks of the right size and a corker; never reuse old corks, which NDSU Extension warns carry microbes and frequently leak.
- Stand the bottles upright. Virginia Cooperative Extension leaves corked bottles upright for 3 to 5 days so the corks expand and seal.
- Store on their sides. After that, lay them down in a cool, dark place so the corks stay moist.
- Label and log. Note the wine, the date and any additions, which makes later batches easier to repeat.
Choosing the Right Corks and Bottles
Cork size is the part most beginners get wrong. Clemson Extension explains that corks are usually sold as number 7, 8 or 9: #7 for demi bottles and smaller, #8 for standard and magnum bottles you will drink fairly soon, and #9 for standard and magnum bottles you may age for many years. NDSU Extension adds that #9 corks fit most US-made bottles, while bottles from other countries with smaller necks may need #8.
Natural, Agglomerated or Synthetic
Clemson Extension explains that natural corks come from the bark of the cork oak, while some modern corks are made from a synthetic, plastic-based material, and that both can be bought to close homemade wine. Agglomerated corks, like the two cork packs mentioned below, are sold as a cork-based option for home bottling. Whatever you choose, use them once: Clemson and NDSU Extension both say used corks cannot be reused.
Bottles You Can and Cannot Cork
Standard wine bottles hold 750 ml, demi bottles 375 ml. Clemson Extension's warning is worth repeating: screw-top wine bottles should not be corked, because the glass around the neck is thin and can break. Use bottles that held only wine or are new, and never bottles that held chemicals. If you would rather skip corks entirely, Clemson Extension notes that twist caps and swing-top bottles protect wine from oxygen less well than corks and suit wine you will drink within a year.
Floor Corker vs Double Lever Corker
There are two common types of wine corker for home use. Clemson Extension describes floor corkers as large, free-standing presses that one person can operate easily, and double lever corkers as small hand-held tools that are much more affordable but take more physical effort and usually a second person to steady the bottle. NDSU Extension says floor corkers are preferred. Our recommendations for each type follow.
Editor's Choice
FastRack Italian Floor Wine Corker
A free-standing floor corker with an adjustable plunger and grip handle: the type extension guides prefer for corking a full batch on your own.
-
Starter set
FastRack Double Lever Corker with 20 Corks
Double lever corker sold with 20 #8 agglomerated corks.
| Corker | FastRack Italian Floor Corker Editor's Choice | Portuguese Double Lever Corker | FastRack Double Lever Corker with Corks |
|---|---|---|---|
| Product |  |  | 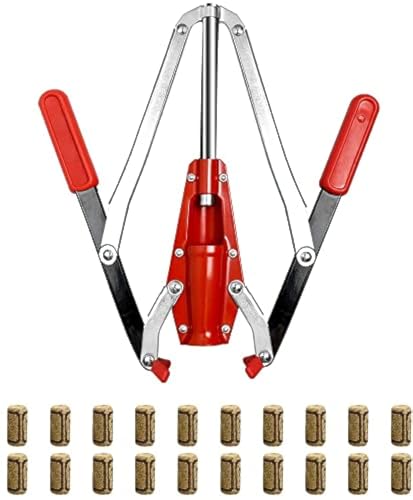 |
| Type | Floor-standing | Hand-held, double lever | Hand-held, double lever |
| Cork sizes | Adjustable plunger | Best with #8 | #7, #8 and #9 |
| In the box | Corker | Corker | Corker and 20 #8 corks |
| Best for | Full batches, one person | Occasional small batches | First bottling day |
| Price tier | $$ | $ | $ |
| Buy | Check price | Check price | Check price |
Editor's Choice
FastRack Italian Floor Corker
- Type
- Floor-standing
- Cork sizes
- Adjustable plunger
- In the box
- Corker
- Best for
- Full batches, one person
- Price tier
- $$
Portuguese Double Lever Corker
- Type
- Hand-held, double lever
- Cork sizes
- Best with #8
- In the box
- Corker
- Best for
- Occasional small batches
- Price tier
- $
FastRack Double Lever Corker with Corks
- Type
- Hand-held, double lever
- Cork sizes
- #7, #8 and #9
- In the box
- Corker and 20 #8 corks
- Best for
- First bottling day
- Price tier
- $
FastRack Italian Floor Wine Corker
This is the corker we would put first on a shopping list if you plan to make wine more than once. It is a floor-standing corker: the bottle sits on a base under the lever, so the bottle is held for you and one person can cork bottle after bottle, which is exactly why Clemson Extension calls floor corkers easy for one person to operate and NDSU Extension prefers them.
The listing describes an adjustable plunger, which sets how deep the cork goes, and a grip handle on the lever. It is the most expensive of the three here, and it takes floor space, so it makes the most sense once you bottle full five or six gallon batches. Pair it with #9 corks for standard US bottles.
Portuguese Double Lever Corker
The classic low-cost corker. You set the cork in the top, place the corker on the bottle and press the two levers down to drive the cork in. The listing says it is double levered for good leverage, made in Portugal, and works best on #8 corks.
The trade-off is effort. Clemson Extension notes that double lever corkers need more physical force than floor corkers and usually a second person to hold the bottle steady. For a few one-gallon jugs a year it is all you need; if you find yourself corking thirty bottles at a time, the floor corker above will save your arms.
FastRack Double Lever Corker with 20 Corks
The same double lever design as a starter set: the listing includes one double lever corker and 20 #8 agglomerated corks, enough for a first batch of wine from a one-gallon or three-gallon kit. The maker says it is made in Portugal and engineered to accommodate #7, #8 and #9 corks.
Choose it if you are bottling for the first time and want the corks in the same order. Once the included corks are used, buy #8 corks for this corker, or move up to a floor corker and #9 corks for longer aging.
Which Corks to Buy With Your Corker
For a floor corker and standard US bottles, #9 corks such as the North Mountain Supply Amorim #9 agglomerated corks are the usual choice. For a hand corker, #8 corks are easier to drive; the FastRack #8 agglomerated corks come in a bag of 100 and the listing describes them as the right size for hand corkers. The bottle listing above says the same thing: #8 for a hand corker, #9 for a floor corker.
Aging and Storing Bottled Wine
NDSU Extension notes that wine is technically ready to drink at bottling but goes through bottle shock, a temporary change that can last three weeks or more, and recommends at least two months of aging, with one year being better. The Virginia Cooperative Extension guide suggests storing finished wine in a cool place at 50 to 60 degrees Fahrenheit and watching for corks being pushed out, carbonation or new sediment, all signs that fermentation has restarted in the bottle.
Storage Checklist
- Bottles on their sides after the first few upright days, so the corks stay moist.
- Cool, dark and steady: somewhere that stays close to 50 to 60 degrees Fahrenheit.
- A rack or box that keeps bottles from rolling.
- A label or log with the date, so you know when each batch reaches two months and one year.
Common Bottling Mistakes
Bottling Too Early
Wine that is still fermenting or still hazy keeps changing in the bottle: sediment forms, and if sugar remains, carbon dioxide builds up. Wait for steady gravity readings and good clarity.
Sweetening Without Stabilizing
Adding sugar to a finished wine without potassium sorbate gives the yeast new food. Both NDSU and Clemson Extension warn that bottles can burst if fermentation restarts.
Wrong Cork or Wrong Bottle
The bottle and corker listings above pair #8 corks with hand corkers and #9 corks with floor corkers, and NDSU Extension reminds you to check that corks are the correct size for the bottle opening. Match the cork to your corker and bottle, and never cork a screw-top bottle.
Reusing Corks
Old corks have been pierced by a corkscrew and, as NDSU Extension puts it, carry microbes and frequently leak. A fresh cork is a small part of the cost of a bottle; a leaking one can cost you the wine.