How to Make Homemade Wine
 Smooth aromas, velvety flavors and gorgeous colors – these are a few main traits of any excellent wine. Couple these with a robust amount of alcohol and a mountain of health benefits and you’ve got yourself one of the finest nectars in the world. The best part? With the proper equipment and knowledge you can make it right at home and drink it all year round. This is exactly what we’re going to take a look at today – a comprehensive, step-by-step guide on how to make homemade wine like a professional.
Now even though there’s a lot of things to learn about homemade wine, in this article we’ll be focusing solely on how to make it perfectly.
You don’t want to miss this – let’s begin!
INDEX
Click the index entries to jump to your preferred section:
- Introduction & Essential Glossary
- Equipment & Ingredients Needed
- Full Step by Step Homemade Wine Guide
- Short Step by Step Summary for Making Red Wine and White Wine at Home
- Differences Between Red and White Wines
- Wrap-Up
Grape Wine – A Quick Introduction
Contrary to popular belief, wine wasn’t first brewed in France or Italy. Wine production began in the Zagros Mountains and Caucasus Mountains.
The oldest evidence of ancient wine production dates to around 6000 BC and the Shulaveri-Shomu culture (Stone Age) people were the first to make the first wines. The oldest winery was found around caves close to the Areni Village in Armenia which is famous for making red wines from Areni grapes.
From the Caucasus region, winemaking was spread by the Phoenicians and Greeks who took the art throughout Western Europe. Because of the different climates and environments in each new region, grapes started to develop differently which led to a mind-blowing diversity of the 1300 known wine variations of today.
While these are just trivial facts, I find the history of wine very interesting and I think everyone should know a bit about it before making it. Due to my Mediterranean roots, I still find that to this day the very best wines are Italian, Portuguese and Spanish although the popular French wines are undoubtedly great too.
California has been producing some excellent wines recently too – using grapes and techniques from France – but in my opinion nothing beats a glass of red wine from the Portuguese Douro or from the sun bathed hills of Italy. Thankfully, as you’re about to see, you can make absolutely stunning wines as well no matter where you live.
Winemaking Glossary
Now, before you start your journey to become an expert home winemaker, you should know the specific winemaking terms and techniques. Let’s brush up on the basics:
- Bx
What is ˚Bx (degrees Brix)? In winemaking, it measures the sugar content of grapes, must, grape juice and wine showing the degree of ripeness at harvest. You can find out the alcoholic content by multiplying the ˚Bx by 0.55.
- Carboy
What is a Carboy? It’s a narrow-necked large glass bottle which is usually protected by frame. It’s used in the fermenting and aging stages of winemaking.
- Crush
What is Crush? Crush is the annual time when grapes are brought in after harvest. It also describes the process of extracting the juice from the grapes.
- Fermentation
What is Fermentation? It describes the process through which yeast transforms sugar into alcohol and grape juice turns into wine. However, Malolactic fermentation is the process of softening wine by using bacteria to transform malic acid into lactic acid.
- Must
What is Must? It’s the grape juice prepared for fermentation.
- pH
What is pH? It’s a measurement which indicates ripeness of grapes in relation to acidity. Most wines have a pH level of around 3 to 4, on a 14-point scale.
- Racking
What is Racking? It’s when you transfer wine from one container to a different one though siphoning, refining the wine by leaving the sediments behind.
- Wine
What is Wine? It’s the best darn thing you’ll ever drink in your life!
Now you’re ready to get started – let’s dive right into it!
How to Make Homemade Wine from Grapes
Whether you want to make red or white wine at home, you’ll need some essential home wine making equipment and supplies before starting. Also, you should consider these three basic notions before starting:
- You shouldn’t over-worry about temperature or oxygen levels.
- Blending is one of the best techniques to use if you want the benefits of wild yeast coupled with the predictability and effectiveness of cultured yeast.
- In general, it’s very difficult to produce amazing wine in small quantities.
Now that you have these little tips in mind, let’s take a look at the equipment needed:
Equipment Needed
As mentioned above, to start making wine at home you need a few pieces of wine making equipment such as:
- Plastic buckets
- Carboys or Demijohns
- Funnel that fits into the neck of the carboys
- Fermentation airlocks
- Any mesh capable of straining
- Clear plastic tubes
- Glass wine bottles
- Sanitized corks
- Hydrometer
Ingredients Needed
Before you start going through the steps on how to make homemade wine from grapes, you should make sure that you have these required ingredients:
Essential Ingredients:
- Wine grapes (quantities and type both vary)
- Wine yeast (either cultured or wild)
- Sanitizing and anti-oxidation agents (like metabisulphite or Campden tablets)
Optional Ingredients:
- Granulated sugar (in my opinion unnecessary)
- Tartaric acid (used to balance pH)
- Diammonium Phosphate – D.A.P (a yeast nutrient used to strengthen yeast, preventing it from getting stuck during fermentation)
- Tannins (used to give a drier, more bitter taste to the wine when the grape skin’s thickness – where tannin comes from – is lacking)
- Golden raisins (used to add body and sweetness)
- Bananas (not recommended for beginners, used to add body)
I’ve written a full, comprehensive list of all the best home wine making equipment, supplies and ingredients you can get – complete with reviews and amazon links so you can get them sent right to your door, quickly and easily. Be sure to read it!
Now, there are other ingredients you can use – as you’ll see on other recipes – but these are the essentials to make the most classic, age-old wine possible coupled with the most popular optional ones (which are used depending on the particular situation such as when the wine needs body, an anti-oxidant or you want it to be a bit sweeter).
You’ll start figuring out what you like best and what fits your style and personal preference as you get more and more practice. This is part of what makes every wine unique.
How to Make Red Wine at Home
By following these simple but delicate steps, you’ll learn how to make red wine at home – a true classic that is the oldest, most popular and deeply cherished wine of all.
1. Harvesting or Purchasing Grapes
Harvesting is the first and most crucial step because the flavor, sweetness, and acidity of wine depend on the moment when the grapes are harvested from the vineyard. Combine traditional methods such as tasting and a scientific approach by measuring climate, and soil fertility levels.
Grapes can be harvested either by hand or machines, however manual harvesting prevents damaging the grapes. Once you’ve picked the grapes, sort them out in bunches and remove the rotten fruit. If you’re purchasing grapes, you should be looking for wine grapes such as Shiraz, Pinot Noir, Merlot, or Cabernet Sauvignon.
Knowing the differences between the types of wine grapes available is key to learning how to make homemade wine.
2. Sanitizing
Before you do anything, you should sanitize all the equipment by using various sanitizers such as Phosphoric sanitizers or Sodium Metabisulphite. Rinse with a large amount of water to remove any chemicals from the equipment that’ll come into contact with the fruit.
3. Crushing
After you’ve removed the bad seeds from the pile, you should destem and crush the fruit. Crushing can be done by hand, feet or by using a mechanical press. To destem the grapes you can rent or purchase a destemmer which will save you an enormous amount of time. Don’t overlook this step and really do your best to remove all stems and stalks as they can give a crisp and harsh flavor to the wine.
After the crush is completed, you’ll obtain fresh grape juice, also known as must, which contains seeds, grape skin, and other fruit solids. This is where the fun begins. Now is a great time to test the grape juice with a hydrometer which should indicate between 11 – 13.5 Baume and a Specific Gravity between 1085 – 1105 (translating into around 11.5 to 14.1% ABV – the sweet spot for most wines). Again, don’t be confused by this step as it’s very simple, the reading simply tells you the Specific Gravity of the current juice, telling you how much sugar it has which accurately predicts how potent it will become (the potential alcohol percentage by volume).
Now you can move the crushed grapes into the large container but don’t exceed more than 2/3 of the container’s capacity to allow expansion during fermentation. This is very important.
4. Adding Sulphur Dioxide
By adding Sulphur dioxide, you prevent bacteria growth, mold, and oxidation (which would result in spoiled wine). You can buy Sulphur dioxide in wine stores as potassium metabisulphite or tablets. The biggest difference is the ease of use, as tablets are easier for beginners to calculate and add while liquid or solid metabisulphite are better for larger quantities of wine or advanced winemakers.
In general, you should add 1 gram of potassium metabisulphite per 10 kg of grapes (22.04 lbs) if they’re in good condition. If the fruits are already in poor condition then you must double the dosage to ensure their survival.
5. Adding Acids
Next, you should decide if you need to add tartaric acid, which balances out the acidity levels of the finished wine. Although you can regulate the pH in the finished product, it’s better to do this before fermentation begins. As a rule of thumb, if the grapes were harvested from warm regions, you’ll need to add acids to offset the increased amounts of sugar in over-ripe fruit.
You can decide on the amount of tartaric acid required by testing pH level. If it’s above the recommended figures (3.2 to 3.6 for red and 3.0 to 3.4 for white), you should add a specific amount of acid to a 4 L (1.05 gallons) sample of grape juice and test if any more is required – when you find the sweet spot on the sample, then you simply multiply the amount you used on the 4 L to fit the overall amount of wine you have.
Here’s a great, in-depth video on testing the wine’s pH:
To recap, the pH levels should read between 3.2 and 3.6, if it’s higher you’ll need to add tartaric acid to balance it out. However, you shouldn’t add more than 3 grams per Liter (0.40 oz per gal) of tartaric because you could damage the flavor of the wine. Also, if you’re doing this adjustment after fermentation, you shouldn’t add more than 1 g/L (0.13 oz per gal).
6. Adding Yeast & Nutrients
Now this is where it gets equal parts tricky and artistic. When it comes to yeast, you’ve got two main options – wild or cultured.
In general, by adding cultured yeast you trigger the fermentation process of the grape juice. If you do this you should dissolve about 5 grams of dry yeast into 50 ml of water (temperature of about 40˚) for every 25 L of must. Wait for 15 minutes before stirring and then add it to the must. You should also add yeast nutrients such as Diammonium Phosphate (D.A.P) which prevents the release of hydrogen sulfide gas. Adding 1 gram/ 5 L of must is enough.
Now wild yeast is a whole other story, one which is much more riskier but also holds incredible rewards. Let’s take a look at both:
Wild Yeast
Wild yeast winemaking is when you make the wine with the natural yeast found in the grapes you’ve used, the equipment, the air, the fermenters, the tools and so forth. While this makes the whole process much more unpredictable as it’s impossible to know what type of yeast naturally occurs in your location – if it occurs at all – and if it’s potent enough to complete the fermentation process, it also gives an unmatched amount of character, identity and uniqueness to the wine that you can’t achieve any other way.
Although I go into detail in the wild yeast article, there are a few things you should know about it if you want to try this route. First of all, you’re much more likely to have wild yeast present in your surroundings when you’re in the fields, farms and other natural areas instead of urban locales. Secondly, you’re much more likely to have successful, potent wild yeast if your region has had winemaking action in the past – not just for a couple of years but for decades.
While I make the overwhelming majority of my wine with wild yeast, it’s only because I’ve been fortunate enough to be located somewhere where the wild yeast is plentiful and powerful enough to complete the fermentation process. As even though some regions have it and you’ll notice that the wine starts fermenting, the wild yeast strain can be weak and unable to complete the process, resulting in a stuck fermentation. While this isn’t unsolvable – you can simply add yeast nutrients to make it more powerful or even add cultured yeast on top to carry it to completion – it’s something you should be aware of and actively pay close attention to and be prepared to fix if you choose this route.
Cultured Yeast
Cultured yeast winemaking, on the other hand, is a much safer and reliable way to complete the process. By buying and using cultured yeast, you know exactly what strain it is, how powerful it is and how well it’ll work. You’re basically ensured to ace the fermentation process. The trade-off is that you lose that more unique character that is, in my honest opinion, an invaluable part of the wine.
Blending Both
There are various techniques to do this but all have the same purpose – to get the best of both worlds. By blending, winemakers aim to get the unique character and charm of the wild yeast coupled with the unmatched reliability and safety of cultured yeast.
The most popular way to do this is to simply separate your must into two containers – one without any added yeast (wild) and another with added cultured yeast. This way if the wild yeast works you can then blend both containers and get a better wine. If the wild yeast fails, you can simply blend both as well and still make a solid wine with only cultured yeast. This acts as a safety net – a solid compromise that a lot of highly popular and respected wineries choose to take.
7. First Stage Fermentation
The wine will begin to ferment, and you should allow it to work on the skins for between 4 to 10 days (sometimes more) depending on the style of wine you’re aiming for. You can easily notice when the fermentation stops and when it does, it means one of two things – the fermentation is either stuck due to weak yeast or it has been successfully completed. The first option is only a possibility if you’re using wild yeast as cultured yeast is ensured to be powerful enough to always complete the fermentation process.
For darker, richly flavored and more potent wines, you should allow the maximum period on the skins and wait until the fermentation process naturally slows down (about 10 days). You should plunge the grapes, moving them down until they drown in the liquid on a regular basis – I recommend daily – to guarantee maximum contact between the skins and the juice. You can do this with any tool you want as long as it’s clean – I do it with a wooden stick that has a flat wooden board on the bottom which I created myself.
8. Straining the Must
After the first fermentation phase is over, you simply strain the must into a container (in this case, it’s called a fermenter) where the second stage of fermentation will occur. While demijohns, carboys and even stainless steel containers are used in modern times by a lot of amateurs, nothing in the world comes close to the flavor, body and aroma that wooden barrels offer the wine. If you’ve got the chance, get yourself a nice wooden barrel of your favorite type of wood – oak being a popular choice – and use it instead of the other options. It’s more than worth it.
Also, never ever use plastic containers. Never. While they can be used to transport wine from one place to another in quick trips, plastic containers should never be used to store wine. It hurts my soul every time I see someone doing it.
Now, regardless of which type of fermenter you end up using, you need to strain the must into it (with a nylon mesh or any other filter you like) by using a large funnel.
If you’re using wooden barrels, lay them down on their side with the entrance hole facing up and fill them all the way up. Remember to always fill the barrels up with water ahead of time to not only make them swell and prevent leaking when it holds your wine but to also detect any major leaks that actually need to be repaired. After this is done, remember to seal it with an airlock.
If you’re using glass fermenters such as a demijohn or a carboy, then the process is similar. Fill them with the wine and then close the gap between the level of wine and the neck of the demijohn/carboy by using clean water. Seal it with an airlock to prevent carbon dioxide from escaping and keep any oxygen from entering.
9. 2nd Stage Fermentation
Once the wine is in your preferred fermenter, it should be left to ferment for around 4 to 8 weeks. During this closed fermentation phase, the liquid will become clear and alcoholic – you’re almost there!
The hiccuping noise from the airlock is a sign that the yeast is working its magic. With time, the yeast cells will drop to the bottom of the container and form a deposit called lees. The enzymes of the exhausted yeast cells produce chemicals which give flavor to the wine, however, you should carefully monitor the sediment as it could begin decomposing and give an unpleasant flavor.
10. Racking the Wine
Once the regular time has passed (4 to 8 weeks) and you notice that the fermentation sounds have stopped (not only the hiccuping but also the slight “bubbling” that you can hear if you put your ear on the container) you should transfer the wine into a different fermenter (or temporary container). If you’ve used glass containers such as a demijohn, you can tell that it’s done when the sediment reaches about 1 to 2 inches on the bottom of the demijohn.
After each racking (transfer of the wine to another container to refine it), you should fill up the previous fermenters/containers with clean water and rinse them. Racking ensures that you filter, clean and refine the wine by moving it into new containers while leaving the sediments in the old ones. All you need to do it is a tube and the power of gravity, which when combined deliver the technique known as siphoning. Here’s a quick video on it:
After you’ve racked your wine a few times – enough to get rid of the sediment – you can then finally close the fermenters (with an airlock) and let them sit in a dark and dry room until the second stage of fermentation ends.
The fermentation process should finish after nine months when the bubbling ends and the wine gets clear. You can test if the yeast is still working by either moving the fermenter into a warmer place and see if that reactivates it or by putting your ear on it and carefully listen for any fermentation sounds (a very unique bubbling sound that you’ll instantly recognize).
Finally, you can also check if the fermentation is complete by giving the wine a hydrometer reading. If it’s complete, it should read below -1 Baume or from around 993 to 995 Specific Gravity.
11. Bottling
The bottling stage is critical to your wine’s quality because during this phase your wine could turn into vinegar (aka wine disease, although some people do this purposely to get vinegar). To prevent this from happening, you can add Campden tablets or Metabisulphite, both of which release Sulphur dioxide into the wine containers and eliminate the bacteria. The measurements are:
For 5 gallons of wine: 1/2 cup of water mixed with 1/4 teaspoon of potassium Metabisulphite and 3.75 teaspoons of potassium sorbate (Sorbistat-K). Stir until fully dissolved into a clear liquid. Add this liquid into the five gallons of wine and stir softly for 1 minute. Re-seal the fermenter and let the wine sit untouched for 12 hours.
Now simply multiply or divide this measurement to fit your quantity of wine.
Keep in mind that potassium metabisulfite is highly agitating to your eyes and respiratory system. Handle the powder or liquid (it comes in both forms) carefully and do not let the dust or the liquids’ fumes into your eyes or breathe it in.
After these steps are done, it’s time for the fun part – bottling!
Take your wine bottles close to your fermenter (or vice versa, whichever is easiest) and carefully start siphoning the wine into them. Always make sure that the bottles are sterilized and clean. The next step is corking them up which needs a few considerations to be perfect. Firstly, the corks need to be sanitized (either by the manufacturer and sealed in a bag that you open before corking or you can do it yourself by soaking them in a water + metabisulphite or Campden tablet mixture and then fully drying them before usage). Secondly, they need to fit the neck of your wine bottles perfectly to make them airtight, you can ensure this by measuring the diameter of both the neck and the corks before buying them.
Now is also a good time for you to taste your wine and check its unique flavors, aromas and color.
12. Aging
When you store wine in a dark and cool place it continues to transform and develop aromas and rich flavors. As time passes, hundreds of compounds interact and create an even more complex structure that defines your wine.
One of the main benefits is the smoothing of the wine’s “edges”. Tannins are one of the three distinctive features of wine and if yours has an excessive amount, it’ll taste astringent. However, the aging process reduces the number of tannins in the wine (which mellow down after at least 8 months) and makes it smoother overall. Aging can last from a minimum of 6 months to a maximum of 4 years although in some cases it can be for even longer.
Only one step left and it’s the most wonderfully enjoyable of all.
13. Enjoy!
Finally, the moment you’ve been waiting for! There’s nothing quite like the satisfaction and accomplishment you feel when you drink your very own homemade wine.
It’s always a good idea to invite your friends over so they can experience a lovely wine tasting in your company while in the comfort of your own home.
Tip: Before having a drink, open the wine bottle and let it breathe for a while. Red wine needs a few moments to breathe and develop before you can properly enjoy it.
Tip: When drinking, hold the wine glass by the stem. The reason for the stem to be so long in wine glasses is for you to comfortably hold them by it so that you don’t warm up the wine by holding the bowl instead.
How to Make Homemade Red Wine: Step by Step Summary
 In short, these are the necessary steps to make red wine at home:
- Harvest or purchase the grapes
- Destem and crush the grapes
- Ferment the grapes
- Strain the wine to remove seeds and skins
- Bottle the finished wine and age it if you want to
Although there are many little details, quirks and other tips and tricks that go into it, as I explained in detail above, these are the main steps to make red wine at home from start to finish.
The process for white is similar but with one outstandingly important switch. Take a look below.
How to Make Homemade White Wine: Step by Step Summary
 While making white wine at home shares similarities with its red counterpart, there are also a few crucial differences. These are the main steps:
- Harvest or purchase the grapes
- Destem and crush the grapes
- Strain the grapes to remove skins and seeds
- Ferment the grape juice
- Bottle the finished wine and enjoy
As you can see, the biggest and most important factor here, apart from the type and color of the grapes used, is the switch between the straining and fermentation steps.
In order to make white wine, you need to remove the skins and seeds from the juice as quickly as possible before allowing it to ferment (as opposed to red, where you let it ferment with the skins and seeds inside the juice).
Let’s take a more in-depth look at the differences between both of these wines below.
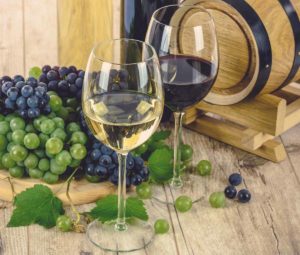
Differences Between Making Red and White Wine at Home
 The real differences between white and red wine go beyond the type of grapes and their color.
Although popular belief is that red wines come from red grapes (Pinot Noir or Cabernet Sauvignon) and white wines from white grapes (Chardonnay or Pinot Grigio), some share the same DNA such as Pinot Noir, Pinot Blanc, and Pinot Gris. This means that you can make white wine with red grapes as long as you quickly remove the skins and seeds.
With all of this said, the main distinction between the two wines is that to produce red wine you should leave the fruit skins in the grape juice during fermentation, while if you want to make white wine, the skins should be removed as soon as possible.
It seems simple – and it is – but it’s this small difference that changes the end result from red to white. Quite interesting isn’t it?
To learn more about the whole process, you can check out this quick but effective video:
There’s also a special technique which involves fermenting white grapes with the seeds and skins resulting in Orange Wines which have tannin and taste like red wines. They’re a nice little deviation that you might want to try for fun.
Another distinction between white and red wines lies in the flavor determined by oxidation. While white wines have floral, zesty and pure aromas, red wines are softer and richer in flavor. This is why red wines are best paired with meat while white wine suits fish and seafood better.
And there you have it – a full guide on how to make homemade wine like a true expert of the trade. If you’ve enjoyed reading this article, you might be interested in the other follow-ups I’ve written for it:
- How to make homemade wine from fruit
- How to make homemade wine from grape juice
- How to make homemade wine without yeast
Wrap-Up
My oh my what a journey it has been. Took me quite a while to write this and I bet it took you a while to read it as well but congratulations – you’re now more than ready to start making your own wine at home!
I did my best to include every little detail and clarify all doubts but if you’ve still got some questions lingering about then please, don’t hesitate to contact me by email or by leaving a comment below – I’ll be here to help. If this is a little too complicated for your first time, you can always get a simple wine making kit to give it a try and get some experience first before delving into the real deal.
Now roll up your sleeves and go make that beautiful nectar! You, your friends and your family will all enjoy the health benefits, superb taste and unique quality of your amazing homemade wine. As always, enjoy responsibly and have fun!
